ENVIS
VK4ION
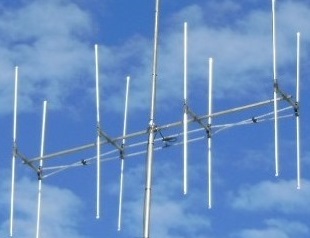
ENVIS Dipole Antenna
40 & 80mtr Dipole for emergency comms
Living in Queensland our biggest threat is tropical cyclones during
the "wet season", from November to March.
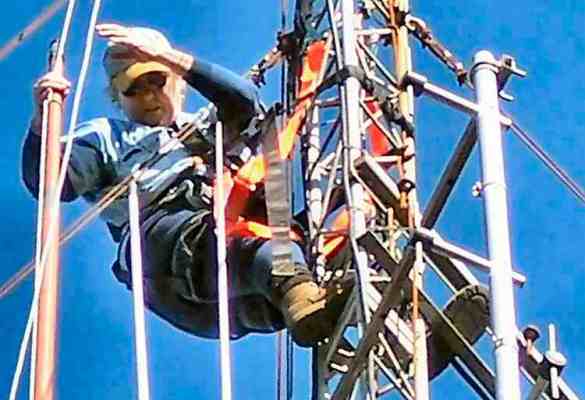
I built an emergency HF antenna that I could quickly erect by myself
(and pack away during the dry season)
Bob Hejl W2IK, is an emergency comms guru, and his NVIS antenna
ideas resonated with me. He was extremely helpful when we chatted a
few years ago and assisted with my design and build.
[You can find Bob's envis-envis-envis-envis-info and designs at
QRZ.com]

Let's go back to the beginning.........
What is N.V.I.S?
Definition: The Near Vertical Incident Skywave (NVIS),an antenna
which provides the majority of its radiation at an extremely high
angle, so the major lobe is between 75 and 90 degrees to the earth's
surface. It provides omni-directional radiation for a distance up to
400 Kilometres, (although I did receive signal reports up to
1600km).
It isn't a long distance antenna, because when you have an emergency
you don't want to tell people in Peru! You need to call someone
nearby - generally within that 400km range.
The "best average frequencies" are between 3.5 Mhz (80m) and 7.3 Mhz
(40m) - exactly the bands that I was looking for.
Based on my research and design we made 3 of these antennas for our
club [Bundaberg Amateur Radio Club] for use by the WICEN group.
In 2012 the Queensland Police, who head our disaster management,
organised an exercise to prove these antennas - the exercise was a
resounding success.
We proved HF communications between Bundaberg and Gayndah, two towns
120km apart with a mountain range in betweeen and normally within
the skip zone. We successfully transmitted messages back and forth.
There is a WICEN page about the Exercise, if you have an interest in
Emergency Comms.
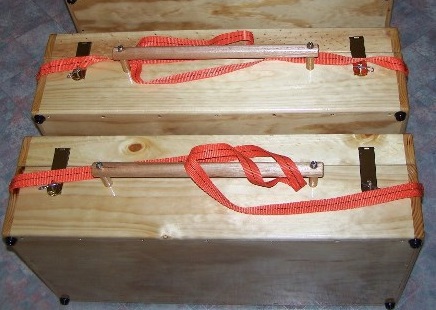
A few simple components found at any hardware store make up this useful HF Dipole antenna and the following gallery should give you some ideas to follow or adapt.
Gallery
The Components
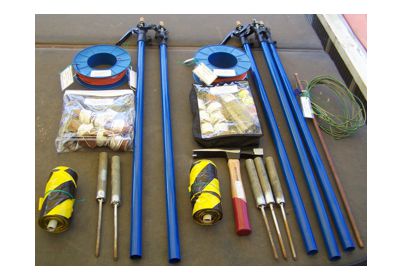
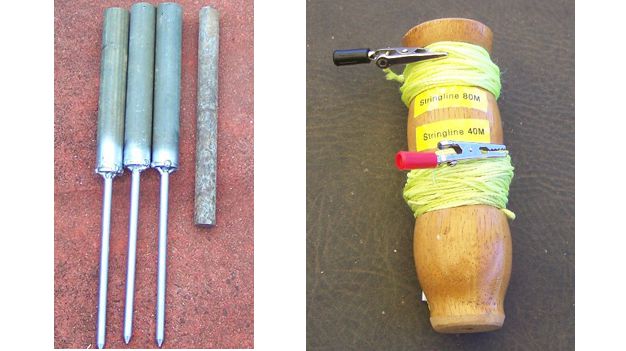
Pipes hold the upright poles, have a spikes welded to bottom
which is pounded into the ground. Using a metal rod & hammer.
The stringlines are cut to exact length to ensure correct
distance between poles.

PVC elbow with UHF fitting.
Use 3 poles for 7MHz (40m), add 2 outer poles to convert antenna
to 3.5MHz (80m) resonance.
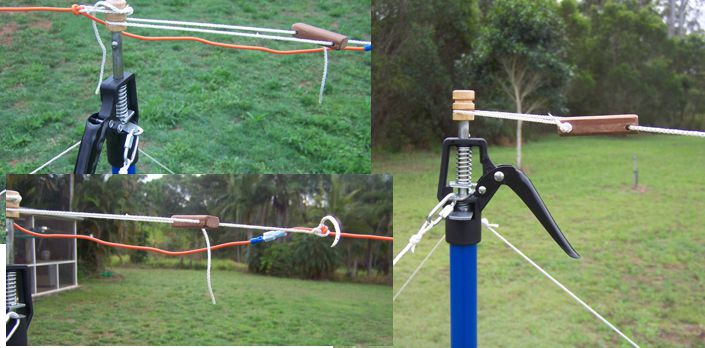
Antenna wire terminates with a spade plug.
When converting to 80m/3.5Mhz, simply add outer poles & connect
the extra wire pieces.
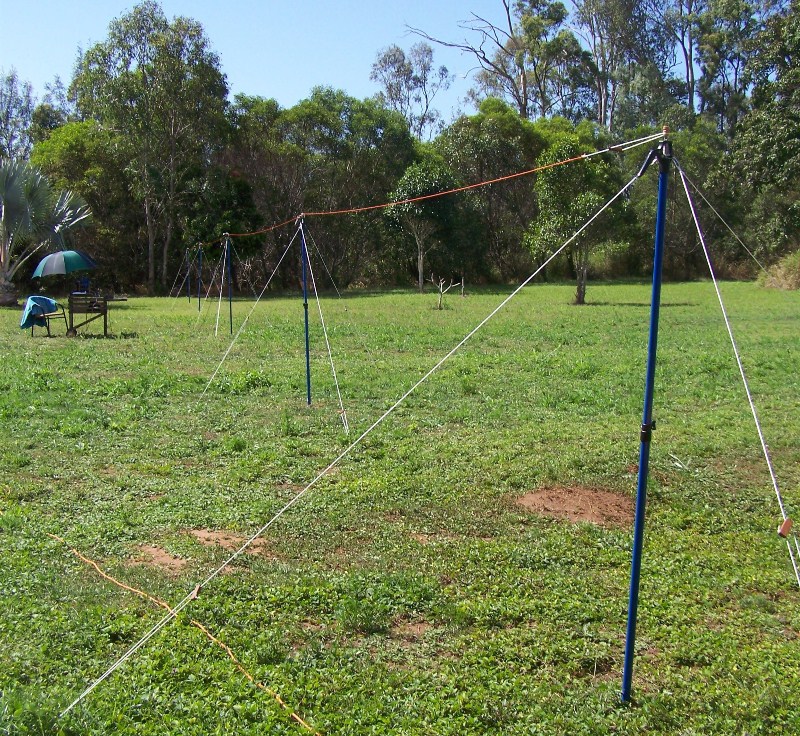
It's a thing of beauty. Simple, lightweight, quick to erect and everything you need is carried in a denim bag.

Old Jeans recycled into a rugged bag to hold the poles &
everything required for this antenna.
Note the labels... they speed up the process so you're not
trying to remember where things fit together.
Technical information
NVIS - a Starting Point if you're interested
If this antenna is of interest to you you can adapt it to suit your
needs.
This is some theory, so you can familiarize yourself with the basics
and be inspired to build a better one to suit your needs.
The Advantages
- Usable on several HF ham bands
- Hears stations just beyond the ground wave range
- Works into the Skip Zone (an area of no signal)
- Can reach areas behind obstructions and in dense foliage
- NVIS stations can establish reliable comms without using repeaters
- Antenna is low-to-the-ground - quick and easy to erect by solo operator
- Due to short path to & from ionosphere relatively free from fading & lower path losses due to absorption by the D layer
- Reduced noise & interference so offer improved signal/noise ratio
- Works well with low power due to improved signal/noise ratio and low path loss
- Great addition to field-day or contesting antenna packs
- Easy antenna to deploy on camping trips to get RF out of valleys or deep canyons
Limitations or Disadvantages
- Must work frequencies below the Maximum Usable Frequency (MUF).
- NVIS is not a DX antenna.
- For best results, both stations should be optimised for NVIS operation
- NVIS doesn't work on all HF Bands
- Day and Night propagation differs so a minimum of two different frequencies would be used for 24hr operations
Frequencies for NVIS
Selecting optimum frequency for NVIS operation depends upon many
variables e.g. time of day, time of year, sunspot activity,
atmospheric noise, and atmospheric absorption.
In Australia we would expect to work the frequencies allocated
for emergency services [WICEN].
Propagation prediction software is also available on the web,
giving the current critical frequencies.
It's important to prepare a backup plan between operators with
alternate frequencies, or agreement to follow a pre-arranged
pattern to "find each other" i.e. begin at frequency, then steps
of +/- 5kHz.
Whatever works for your emergency comms group!
Practical considerations
1. Remember your amateur radio training and basic antenna
propagation theory? An antenna sends out a ground-wave which may
travel up to 300km. The antenna is also radiating a sky wave
that is refracted by the ionosphere and returns to earth (some
greater distance away).
There is a “dead zone” of "no signal" between where the ground
wave ends, and where the sky wave comes back to earth. The dead
zone is called the Skip Zone.
The NVIS antenna is for "short-distance" HF communication into
the Skip Zone. You're attempting to communicate within your
region/state/country.
2. Research... the frequencies and performance varies with a
number of factors.
Location:
NVIS Propagation maps indicate that 40M is not generally
available above 30 Degrees North or South of the equator... (Qld
= good for me, maybe not as successful in the southern states of
Australia).
Height above ground:
Technical specs say anywhere from 1.5metres to 5metres, but
there are logistical differences in raising an antenna to those
greater heights. My final antenna design is kept to a low
height, 1.8metres (6foot) above the ground and this is easy for
a solo operator to erect and manipulate.
Practical tests & modeling [available on the web] show that
better coverage is obtained if the antenna is mounted at about
1/20th wavelength above ground and at this height the background
noise level is lower.
This feels counter-intuitive as we're always told... height,
height, height... but an NIVS antenna will be less efficient if
the height is increased.
Ground:
Look at the type of the soil below the antenna? i.e. what's the
conductivity of the earth/ground you are operating above?
Poor conductivity will attenuate up to 3db more of your signal
than high conductivity soil. If the ground is wet after rain the
signals are likely to be greatly increased due to better
conductivity.
So better soil conductivity = better performance so soil may be
the single most important parameter affecting propagation.
Reflector [counterpoise]
Another approach is to lay a wire on the ground under the NVIS
antenna wire, to act as a reflector. Simply a wire laying on the
ground...the full length of the dipole. It can be connected to a
ground rod at one end, or not.
Also consider “watering” your earth stake for a noticeable
improvement in both receive and transmit signals.
About Frequencies:
Convention says you should use 40M during the day and 80M at
night. This is not necessarily correct, especially during
sunspot minimums.
Check the propagation maps and notice some areas are actually
open for 80M but not for 40M in the morning, so don't discount
3.5Mhz up to about noon local time, and we work 7Mhz into the
evening and reach required distances.
That's if folks, as far as I'm interested in taking the
theory.
Research and modelling is available on the web will prove that
an NVIS Dipole at less than 3 metres is pretty impressive with
constant omnidirectional coverage.
As I stated in the introduction, emergency communications was my
goal; a solo operator using a 'quick and easy' to erect antenna.
This one keeps the antenna height manageable and utilises the
NVIS science to put out effective signals.
It ticked all the boxes for me.
Personal Projects
Never stop learning, sharing knowledge or travelling
Each of these images will link to a dedicated webage where I share my Amateur Radio projects or travel pages.


Next up......................

To be sure..
Contact Me
Please email me if I can assist with information about my projects (or if you notice a broken link).
